Wall Preparation Tips for Panelling Made Simple
Key Takeaways
- Proper wall preparation is essential for a professional-looking panelling project.
- Good prep work prevents common issues like gaps and peeling edges.
- Effective preparation ensures the durability of your panelling over time.
- Wall preparation tips apply to various projects, from nurseries to accent walls.
- Taking the time to prep properly can save you frustration and wasted effort.
Table of Contents
- Why Proper Wall Preparation Matters
- Understanding Your Walls: Assessing Conditions Before You Start
- Clearing and Cleaning Your Walls: The Prep Walkthrough
- Repairing Surface Damage: From Cracks to Wonky Walls
- Priming and Sealing: The Foundation of Success
- Measuring & Marking: Precision Prep for Beautiful Panelling
- Choosing the Right Panel Type for Your Space & Wall
- Step-by-Step Panel Installation: From First Cut to Final Finish
- Advanced Techniques for Modern, Seamless Panelling
- Fixes and Troubleshooting: What to Do When It Goes Wrong
- Cost & Convenience: DIY vs. Professional Installation
- Professional Installation: When to Call in the Experts
- Maintaining Your Panelled Walls: Built to Last
- Making Sustainable Choices for Family Homes
- Adapting Panelling as Your Family Grows
- Your Path to Beautiful, Lasting Panelled Walls
Wall Preparation Tips for Panelling Made Simple
Getting wall preparation tips for panelling right makes the difference between a weekend project you're proud to show off and one that leaves you frustrated with gaps, peeling edges, and wasted time. Whether you're transforming a nursery into a toddler's bedroom or creating a durable accent wall that can handle the daily chaos of family life, proper prep work ensures your panelling looks professional and lasts for years.
We've spent years working with families who want beautiful, functional spaces without the hassle of multiple tradespeople or the uncertainty of DIY disasters. Through our network of expert joiners and countless custom installations, we've learned exactly which wall preparation tips for panelling actually work in real family homes, and which shortcuts always come back to bite you.
For those starting out, having the right installation tools on hand can make all the difference in achieving a professional finish and avoiding common pitfalls.
Why Proper Wall Preparation Matters
Wall panelling transforms busy family spaces by creating surfaces that are both beautiful and resilient to sticky fingers, scuff marks, and the general wear that comes with daily life. But panels are only as good as the wall beneath them, skip the prep, and you'll end up with wobbly sections, visible gaps, and panels that start lifting within months.
Poor preparation costs you twice: first in materials when panels fail, then in time when you're back to square one. We see this constantly, families who rushed the prep stage end up spending their weekends fixing problems instead of enjoying their newly transformed rooms. Invest 2-3 hours in proper wall preparation, and your panelling will stay put through years of family life.
Most Important Prep Step
Cleaning and priming your walls properly. Even perfect measurements won't save panels stuck to dusty, greasy, or powdery surfaces. A clean, primed wall creates the strong bond that keeps your panelling secure through everything family life throws at it.
Understanding Your Walls: Assessing Conditions Before You Start

British homes present a mix of wall types, each needing slightly different preparation approaches. Plasterboard walls (common in newer builds) are generally smooth and panel-ready, while older properties often have lime plaster that can be powdery or uneven. Painted walls need assessment for flaking or multiple paint layers that might not hold adhesive well.
Run your hand along the wall surface, any powder on your palm means the surface needs stabilising before panelling. Look for obvious cracks wider than hairline, any soft or spongy areas when pressed, and water stains that suggest damp issues. These problems won't disappear under panels; they'll get worse and eventually show through.
Check around radiators, windows, and external walls particularly carefully. These areas see temperature changes and potential moisture that can affect panel adhesion. If you spot anything concerning, especially damp or structural cracks, sort these issues before any panelling goes up.
Clearing and Cleaning Your Walls: The Prep Walkthrough
Start by removing everything from the wall: old wallpaper, loose paint, and any existing fixtures. Use a broad scraper for large areas and a smaller palette knife for detailed work around edges. Keep dust sheets down and windows open, this stage gets messy, and you don't want dust settling on other surfaces.
Once cleared, clean thoroughly with a solution of warm water and a small amount of washing-up liquid. For greasy areas (common in kitchens), make a paste with bicarbonate of soda and water, it cuts through grime without harsh chemicals that could affect your family's air quality. Wipe down with clean water afterward to remove any residue.
Allow walls to dry completely, this usually takes 2-4 hours depending on room temperature and ventilation. Rushing this stage leads to poor adhesion because moisture trapped between the wall and panels creates the perfect conditions for failure. While you wait, this is the perfect time to measure and plan your panel layout.
Repairing Surface Damage: From Cracks to Wonky Walls
Small holes and hairline cracks can be filled with standard decorator's filler, use a filling knife to press it firmly into gaps, then scrape excess cleanly away. For deeper holes or larger cracks, you'll need a two-stage approach: rough fill first, let it cure, then a finishing coat sanded smooth.
Don't overfill, it's easier to add a second thin coat than sand down a lumpy mess. Most fillers cure in 2-6 hours for thin applications, but deeper repairs might need overnight drying. Test with gentle finger pressure; properly cured filler feels solid and cool, not soft or warm.
For walls that are significantly uneven, consider whether panelling is the right solution. Minor bumps and dips disappear under panels, but major undulations will show through and affect the finished look. Sometimes a quick skim coat of plaster (or calling in a plasterer) saves frustration later.
Priming and Sealing: The Foundation of Success

Priming creates the bond between your wall and panels, skip this, and you're relying on hope rather than proper adhesion. For most walls, a diluted PVA solution works perfectly: mix one part PVA adhesive with four parts water, apply with a brush or roller, and allow to dry until tacky (usually 30-60 minutes).
Painted walls in good condition might not need traditional primer, but they do need a light sand to create a key for adhesive. Use fine sandpaper (240 grit) to scuff the surface lightly, you're not removing paint, just dulling the shine. Wipe away dust with a damp cloth before proceeding.
For powdery or chalky walls, use a stabilising solution first, then prime once that's cured. This two-step process takes longer but prevents the common problem of panels pulling away chunks of loose wall surface. All our recommended primers are low-VOC and family-safe, important when you're working in spaces where children play and sleep.
Measuring & Marking: Precision Prep for Beautiful Panelling
Accurate measuring prevents the expensive mistakes that turn weekend projects into month-long ordeals. Start by measuring your wall's height and width in at least three places, older houses rarely have perfectly square rooms, and you need to know about variations before cutting panels.
Mark your panel positions lightly in pencil, using a spirit level to ensure vertical lines are truly vertical. For horizontal panelling, mark your starting point carefully, small errors multiply across a wall and become glaringly obvious once panels are up. Always measure twice and cut once, especially with custom-made panels that can't be easily replaced.
Account for obstacles like light switches, radiators, and skirting boards in your measurements. It's often easier to remove skirting temporarily than try to cut panels around it, and the finished result looks much more professional. Leave 2-3 mm expansion gap around the edges, wood naturally expands and contracts with humidity changes, and this small allowance prevents buckling or cracking later on.
Double-check your measurements against the actual panels before making any cuts. Even with careful planning, walls aren't always perfectly square, so test-fit everything dry first. Mark any adjustments needed with a pencil, you can always erase marks, but you can't un-cut wood.
Choosing the Right Panel Type for Your Space & Wall
Not all panels work equally well in every room, and understanding your options helps you make the right choice for your family's needs. Wall preparation tips for panelling must account for the specific material you're installing, as different panels require different approaches.
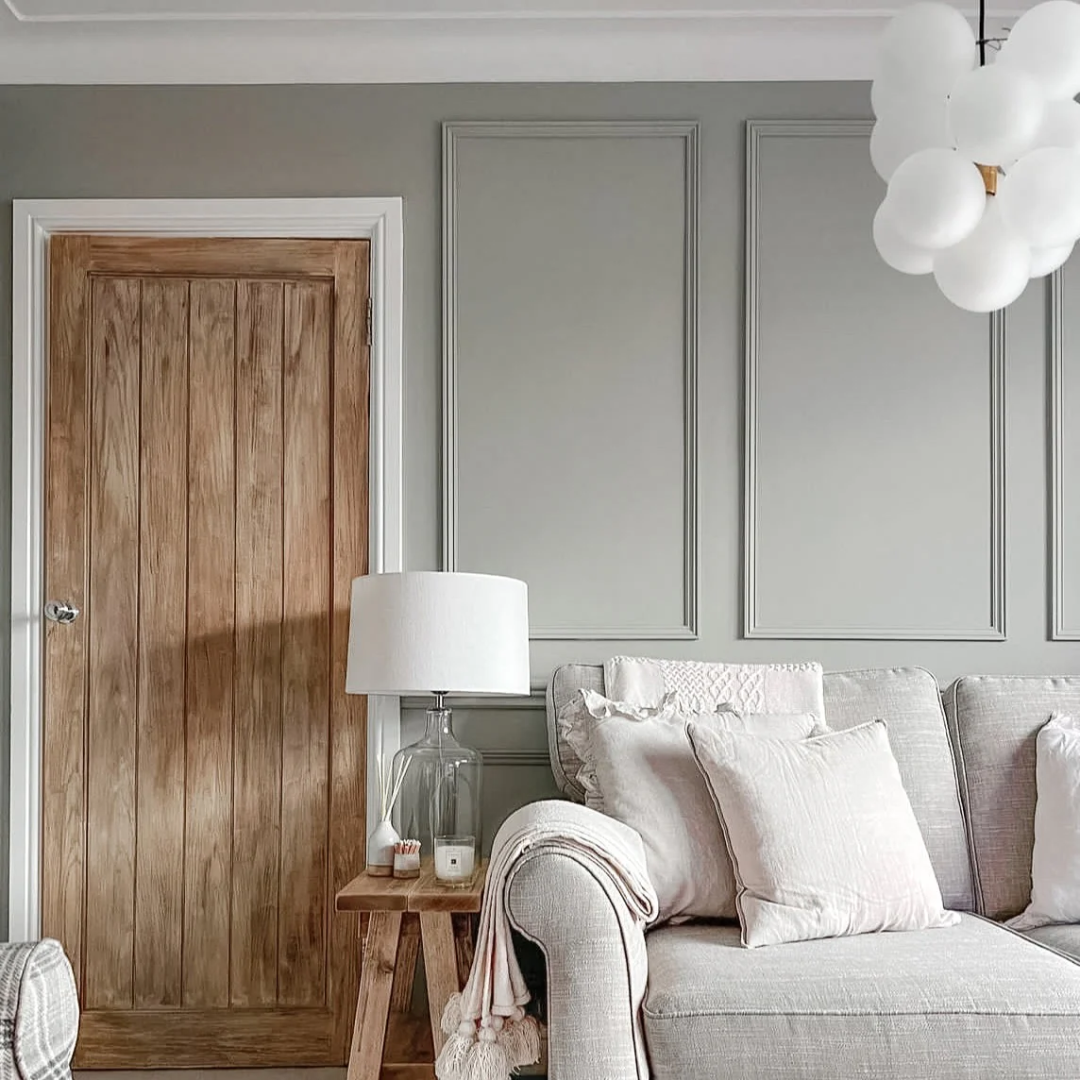
Solid wood panels offer unmatched durability and can be sanded and refinished multiple times, perfect for high-traffic family areas. They need stable wall conditions and proper sealing to prevent moisture damage. MDF panels provide smooth, paintable surfaces ideal for children's rooms, though they're less forgiving of moisture. Moisture-resistant options like treated plywood work brilliantly in kitchens and bathrooms where humidity is a concern.
| Panel Type | Best For | Durability | Moisture Resistance | Child Safety |
|---|---|---|---|---|
| FSE Approved Solid Wood | Living areas, hallways | Excellent - decades of use | Good with proper sealing | Naturally smooth, splinter-free finish |
| Premium MDF | Bedrooms, playrooms | Very good for indoor use | Requires moisture barrier | Smooth surface, easy to clean |
| Marine Plywood | Kitchens, bathrooms | Excellent in wet conditions | Outstanding | Sealed edges prevent water ingress |
At Roomix, our panels come with FSE Approved Wood certification and meet Recognised Safety Standards, crucial when little hands explore every surface. You can customise finishes, colours, and wood waxes to match your family's style, while our expert joiners ensure each piece fits your exact specifications.
For inspiration on how to use panelling in different rooms, explore these most popular designs for DIY wall panelling to see what works best for your space.
Step-by-Step Panel Installation: From First Cut to Final Finish

With your walls properly prepped, installation becomes straightforward. Start by cutting your panels to size, measure twice, cut once remains the golden rule. Sand any rough edges smooth, particularly important in homes with children who might run their hands along surfaces.
For adhesive mounting, apply construction adhesive in pea-sized blobs every 20cm along the back of each panel. Press firmly against the wall and hold for 60 seconds, this initial contact is crucial for proper bonding. Allow 24 hours before applying any pressure or hanging items on the panels.
Mechanical fixing works well for heavier panels or areas that might need future access. Use 50mm screws into wall plugs, positioning them where they'll be hidden by trim or furniture. Pre-drill pilot holes to prevent splitting, especially near panel edges.
Safety First with Little Ones Around
Cover all tools when not in use, keep adhesives out of reach, and ensure good ventilation during installation. Schedule work during nap times or when children are elsewhere, rushing because of distractions leads to mistakes.
Finish with decorator's caulk along edges and joints. Run a thin bead, smooth with your finger, and clean excess immediately. This creates seamless transitions and prevents dust collecting in gaps, essential in busy family homes where surfaces need regular cleaning.
For a ready-to-go solution, consider the Shaker Wall Panels Kit for a simple and stylish installation process.
Advanced Techniques for Modern, Seamless Panelling
Professional-grade results are achievable with the right approach, even for home installers. Hidden fixing systems create clean lines without visible screws or nails. Use panel clips that hook onto wall-mounted rails, the panels simply click into place and can be removed for decorating or repairs.
Scribing techniques help panels follow uneven walls perfectly. Hold the panel in position and use a compass to trace the wall's contours onto the panel edge. Cut along this line for a perfect fit that looks built-in rather than added-on.
For truly seamless results, consider shadow gaps, deliberate 3-5mm spaces between panels and ceilings or floors. These create clean architectural lines and eliminate the need for perfect cuts, while accommodating natural building movement. Paint the wall behind in the same colour as your panels to make gaps virtually invisible.
Our Roomix joiners often recommend edge-banding for exposed panel edges, thin strips of matching wood that create perfectly smooth transitions. Apply with contact adhesive and trim with a sharp blade for professional results that withstand family life's demands.
If you're working on a bathroom, don't miss these bathroom wall panelling top tips for moisture-prone spaces.
Fixes and Troubleshooting: What to Do When It Goes Wrong
Even with careful preparation, issues can arise. Visible gaps between panels are easily fixed with decorator's caulk in a matching colour. Clean the gap thoroughly, apply caulk sparingly, and smooth with a wet finger. Allow 30-60 minutes to dry before painting over.
Panels that have lifted or popped usually indicate insufficient adhesive or wall contamination during prep. Remove the panel carefully, scrape off old adhesive, clean both surfaces with white spirit, and reapply fresh adhesive. Press firmly and support with temporary braces if needed.
Moisture issues show as dark stains, soft spots, or mould growth. Address the underlying cause first, check for leaks, improve ventilation, or add moisture barriers. Replace affected panels rather than trying to repair them, as moisture damage spreads and compromises structural integrity.
Know when to call for help. If you discover structural issues, electrical complications, or extensive dampness, consult professionals. Roomix's network of expert joiners can assess problems and recommend solutions that keep your family safe while achieving the results you want.
For a comprehensive overview of the process, see this step-by-step guide to installing wall panels from Family Handyman.
Cost & Convenience: DIY vs. Professional Installation

DIY installation typically costs £15-30 per square metre for materials, plus your time investment of 2-4 hours per wall depending on complexity. You control the schedule, working around family routines and spreading the project over weekends if needed.
For those looking to streamline their decorating process, having the right decorating tools on hand can make finishing touches much easier and more efficient.
Professional Installation: When to Call in the Experts
Professional fitting brings precision and peace of mind, particularly valuable when panelling high-traffic family areas or working with complex architectural features. Expert joiners handle the entire process, from wall assessment to final finishing, typically completing a room in 1-2 days with minimal household disruption.
The investment ranges from £150-400 per wall depending on size and complexity, but you're paying for guaranteed results and aftercare. Professional installation works particularly well for families with young children, as it eliminates dust, tools, and safety concerns from your living space.
Roomix partners with skilled joiners who understand our products intimately. They arrive with pre-cut, custom-made panels designed specifically for your measurements, ensuring perfect fit and finish. This approach combines professional expertise with our made-to-order quality, no generic, mass-produced compromises.
When Professional Installation Makes Sense
- Complex layouts: Rooms with multiple windows, radiators, or built-in features
- Structural concerns: Older homes with potential damp or uneven walls
- Time constraints: Busy families needing quick turnaround
- Premium finishes: Intricate designs requiring specialist joinery skills
Maintaining Your Panelled Walls: Built to Last
Proper wall preparation tips for panelling pay dividends in long-term durability. Well-prepared walls mean your panels stay securely fixed, maintain their finish, and resist the inevitable knocks and scuffs of family life.
Quality wood panels, like those crafted by Roomix joiners using FSE Approved Wood, naturally resist wear when properly installed. A light dusting every few weeks and occasional touch-ups with matching wood wax keep them looking fresh. The initial investment in thorough preparation eliminates common issues like panel lifting, gap formation, or finish deterioration.
For families, this translates to walls that actually improve with age rather than showing every crayon mark or football impact. The robust preparation we've outlined ensures your panelling withstands years of daily family life whilst maintaining its beautiful appearance.
For more on the basics of wall prep, check out this authoritative guide to wall preparation from the National Park Service.
Making Sustainable Choices for Family Homes

Choosing quality panelling over disposable alternatives reflects a shift towards sustainable family living. When you invest time in proper preparation and select well-made panels, you're creating features that last decades rather than years.
Roomix's made-to-order approach eliminates waste, each panel is crafted specifically for your space, with no excess inventory sitting in warehouses. Our FSE Approved Wood comes from responsibly managed forests, and the absence of nasty chemicals means safer air quality for your family.
The longevity factor matters enormously. Mass-produced panels often fail within 5-7 years, requiring replacement and creating waste. Quality preparation and custom-made panels create lasting value, both financially and environmentally, for families planning to stay in their homes long-term.
Adapting Panelling as Your Family Grows
Family needs evolve, and smart panelling choices accommodate these changes beautifully. The wall preparation tips for panelling we've covered create a solid foundation for future adaptations, whether that's adding hooks for school bags, incorporating display shelving, or creating feature walls in different rooms.
Roomix's customisable approach means you can start with simple panels in a nursery, then add safety features, storage elements, or decorative details as your child grows. The modular nature of well-planned panelling allows for modifications without starting from scratch.
Consider how spaces might change: today's home office could become tomorrow's playroom, or a formal dining area might transform into homework central. Neutral, quality panelling provides the perfect backdrop for these evolving family functions whilst maintaining style and durability.
Your Path to Beautiful, Lasting Panelled Walls
Successful panelling starts with patience during preparation. The wall preparation tips for panelling outlined here, from thorough cleaning to precise measuring, form the foundation of results you'll love for years to come. Whether you choose DIY installation or professional fitting, this groundwork remains essential.
For busy families, Roomix offers the perfect middle ground: custom-made quality without the wait times or inflated costs of traditional bespoke joinery. Our made-to-order panels arrive ready for installation, backed by expert joiner knowledge and designed specifically for family life.
Ready to transform your walls? Start with proper preparation, choose quality materials, and don't rush the process. Your family deserves walls that work as hard as you do, beautiful, functional, and built to last through every stage of family life.
Frequently Asked Questions
Why is proper wall preparation crucial for a successful panelling project?
Proper wall preparation ensures your panelling fits perfectly and stays secure over time. It prevents common issues like gaps, peeling edges, and uneven surfaces, giving you a professional finish that lasts through the daily wear of family life.
What are the essential steps involved in preparing walls before installing panelling?
Key steps include cleaning the wall thoroughly, repairing cracks or holes, sanding uneven areas, and applying primer or sealant. Accurate measuring and marking are also vital to ensure panels align correctly and avoid gaps or misfits.
How do I assess my wall's condition to determine the necessary preparation for panelling?
Start by checking for surface damage like cracks, bumps, or damp spots. Use a level to spot uneven areas and look for peeling paint or wallpaper. This assessment helps you decide whether repairs, sanding, or sealing are needed before installation.
When should I consider hiring a professional instead of doing a DIY panelling installation?
If your walls have significant damage, uneven surfaces, or tricky angles, a professional can ensure a flawless finish. Also, if you’re short on time or confidence with measuring and cutting, calling in an expert can save frustration and guarantee durability.


